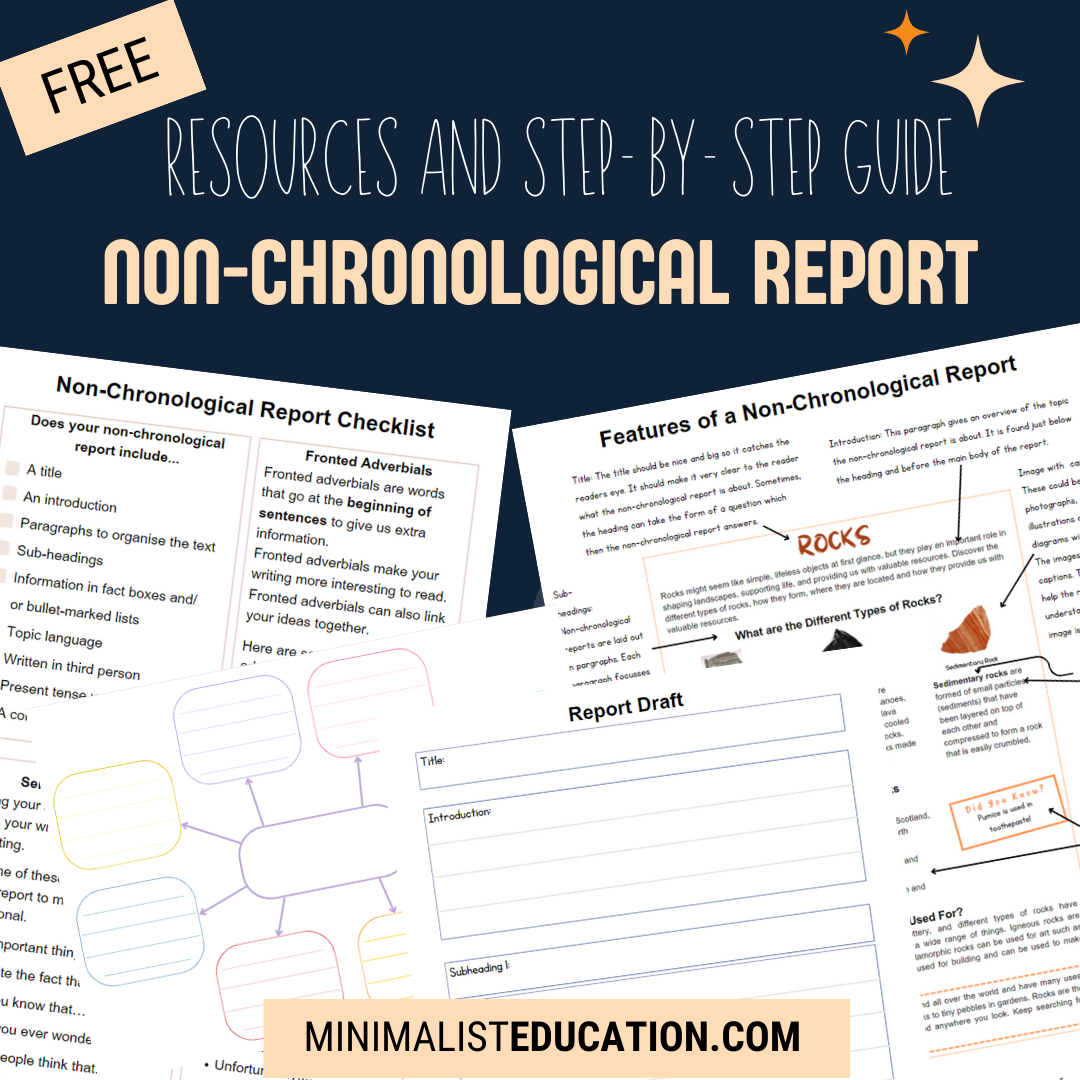
Step-By-Step Guide (and Resources): Writing Non-Chronological Reports
In this post I will be explaining:
- What a non-chronological report is
- Why write a non-chronological report
- The step by step process of writing a non-chronological report
I have also created free downloadable resources to write non-chronological reports:
- An example of a non-chronological report
- A printable resource explaining the features of a non-chronological report
- A printable mind-map for brainstorming
- A printable non-chronological report planning template
- A printable non-chronological report features checklist and sentence starters reference
Reading and writing doesn’t just have to be about fiction. Sometimes we forget that every subject has specialist vocabulary, every subject requires writing.
Teaching your child how to write notes, summaries, reports, and essays will give them vital skills needed to organise information they learn.
In the earlier years, non-chronological reports are a perfect way to incorporate other subjects into the reading and writing experience. It’s also a way to connect our children’s interests to academic skills.
Non-fiction writing is the way our kids can document, organise, and express the information and knowledge they learn whether it is through making notes, summaries, presentations or reports.
What Is a Non-Chronological Report?
A non-chronological report is a type of writing that provides facts and information about a specific topic. Unlike a story, or an account of a historical event, or instructions, which all goes in order from beginning to end, a non-chronological report doesn’t have to follow a timeline.
Imagine your child wanted to write a report about their favourite animal- a lion. In a non-chronological report, they might share exciting facts about lions, like where they live, what they eat, how they look, and the amazing things they can do. They could add some pictures or diagrams to help explain things better.
The Multiple Benefits of Writing a Non-Chronological Report
The great thing about a non-chronological report is that they can organise it into different sections of their choice, like having one part about the lion’s habitat, another part about its diet, and another part about its amazing hunting skills. It’s like putting together a puzzle of information to give a clear picture of the animal.
Non-chronological reports are like mini encyclopaedias or information books, and they help others learn new things about a topic they might not know much about.
Writing a non-chronological report often involves research across different subjects. This is perfect for our homeschool settings as lessons don’t need to be penned in to specific subjects. Topics for non-chronological reports can be anything that interests your child: science, art, cooking, history, even literature.
Whilst producing a non-chronological report, your child gets to practice multiple skills. They will be engaged in research, organising information, critical thinking, developing written communication skills. In order to produce a non-chronological report children have to gather information from various sources, analyse the data, and present it in a coherent and structured manner.
Non-chronological reports are also a perfect way for children to be engaged in self-directed learning and creatively expressing themselves. Even though non-chronological reports are informative in nature, children can present it in so many creative ways.
In the rest of this post, I will be detailing the step-by-step process of teaching our kids how to produce a non-chronological report from scratch into a finished product.
Step by Step: How to write a Non-Chronological report
These steps should be done over several sessions. Take as long as needed for each one.
Step 1: Identifying the Purpose and Features of a Non-Chronological Report
Explain that a non-chronological report is a type of informative writing that provides facts and information about a particular topic.
Unlike a story, it does not follow a strict chronological order but organises information into sections or categories.
Have a look at examples of a non-chronological report and identify features of a non-chronological report together.
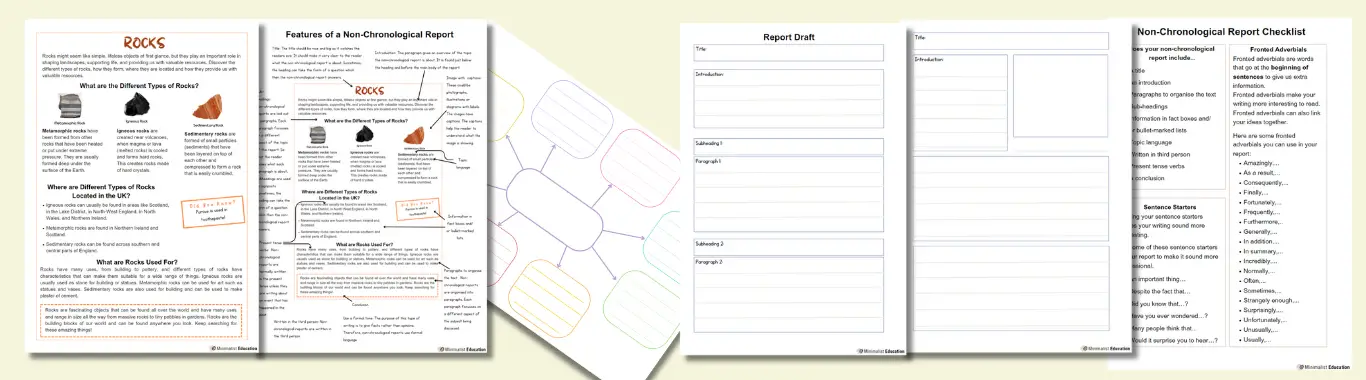
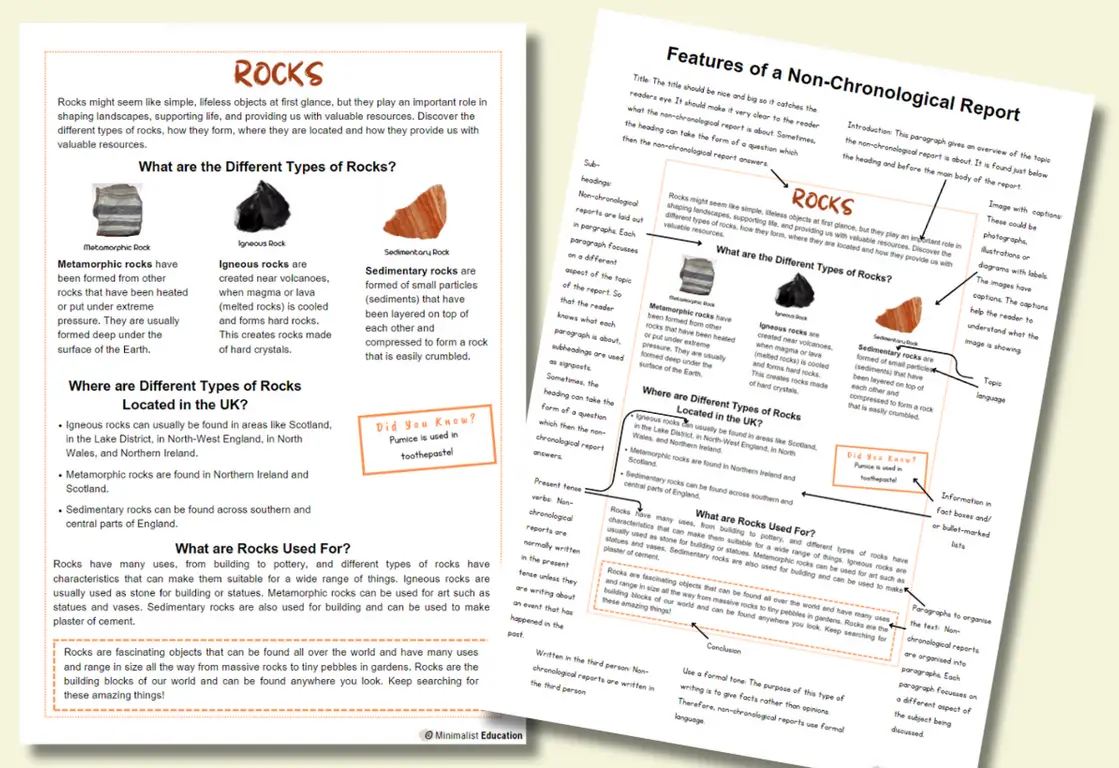
I have provided an example non-chronological report, with and without annotations highlighting features typically included in a non-chronological report. You can look at these with your child to get ideas of features to include and how they might present their report.
Download an example non-chronological report:
Download a fully annotated features of a non-chronological report:
Alternatively, you can use the non-chronological features checklist that I have made and hunt for the features mentioned in the checklist on the reports. Your child can also use this as a checklist for their own report to remind themselves of what to include.
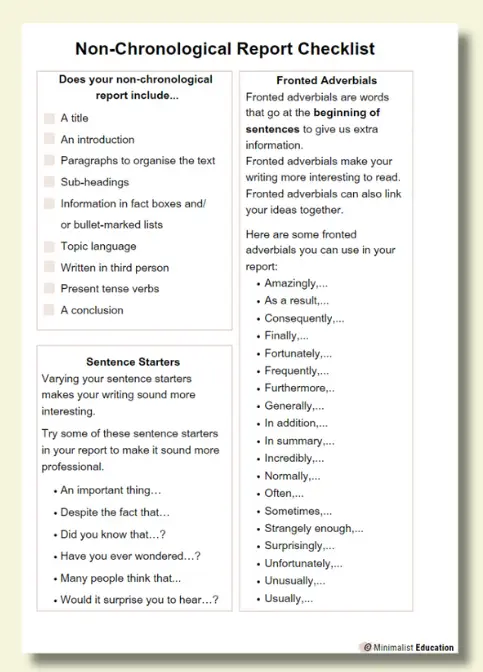
Download the features of a non-chronological report checklist:
Step 2: Choosing a Suitable Topic
You might already have an idea of the topic your child will do their report on. It helps if it’s tied in with something relevant to what they have recently encountered in their studies or a topic that they are interested in or curious about.
Step 3: Researching the Topic
In this step, take as much time as your child needs and wants to get familiar with the topic. This can be through reading books, articles, researching on the internet, watching YouTube clips or documentaries. If appropriate or feasible, incorporate practical activities or field trips.
Allow them to immerse themselves in the topic and tell you what they learn. Ask them questions based on what they tell you to get them to dig deeper into their research.
Step 4: Organising Information
Once the research has been done, it is time to think about writing the report. Get your child to think of three (or more) sub-categories within their chosen topic they want to write about.
However, be aware that this is usually a really difficult step for kids. While it’s easy for us with our adult minds to sift through all of the information in our heads and sequence and categorise information into related sub-topics, it’s not easy for children to do without lots of practice.
You can help make this step easier for your child by helping them brainstorm sub-topics they encountered during their research, and then using this as a spring board of choosing what categories to write about from this list.
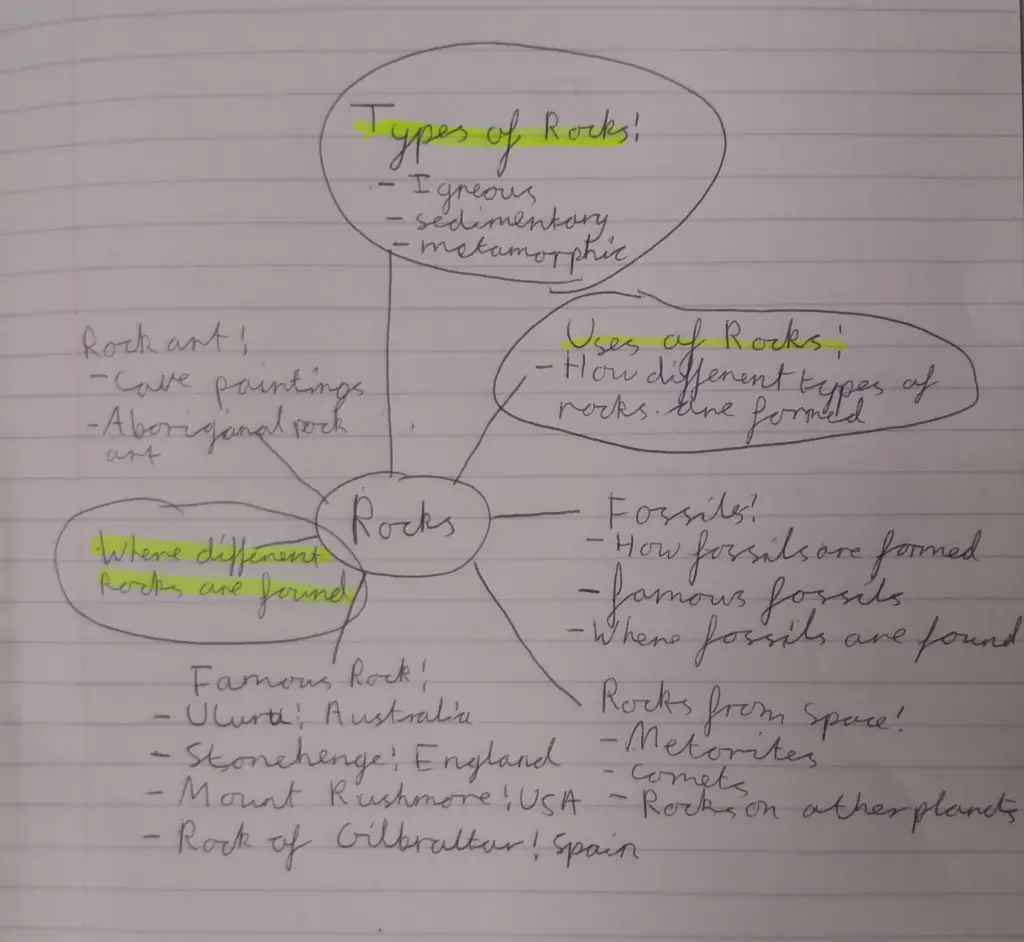
The brainstorm can be in list format, on post-it notes, or my favourite- a spider diagram or mind map.
Obviously brainstorming everything they have learnt about their topic is a huge task. Let them browse through the books they used to learn about their topic so that they can remind themselves of the things they learned. If it makes it easier, you can write their brainstorm ideas while they tell you.
You can download and print my mind-map template for this or just do it freehand on paper.
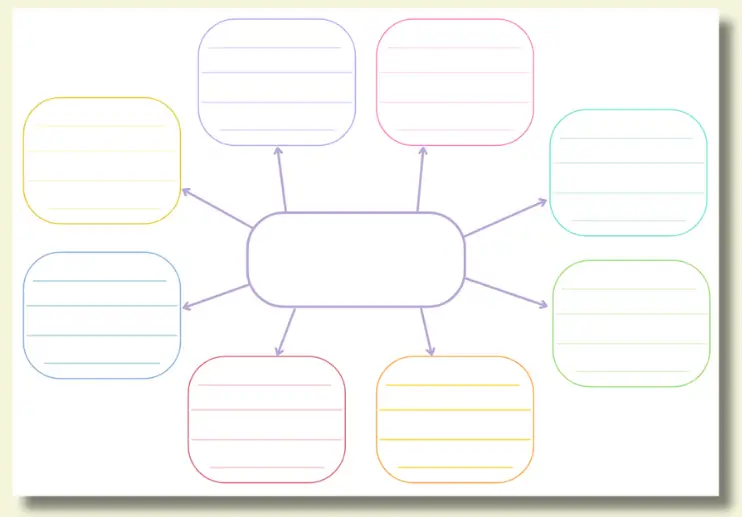
Download the mind-map template:
Now they have a master list of ideas to choose from when deciding what sub-topics to write about in their report.
Get them to choose around three sub-topics from this list that will form their main three sections in their report.
For the final report, they will also need to include an introduction section and to make things a bit more engaging. This can be done by adding an “interesting facts” or “Did you know?” section.
Step 5: Writing the Introduction
Writing an introduction is hard! Help your child to write an introduction that briefly introduces their topic and grabs the reader’s attention.
They can share a fun fact, a quote from a book, an anecdote – something that will hook the reader.
For the next steps of the writing process, you can use the non-chronological report planning template to write the draft. This might help your child to visualise how their final report will look like.
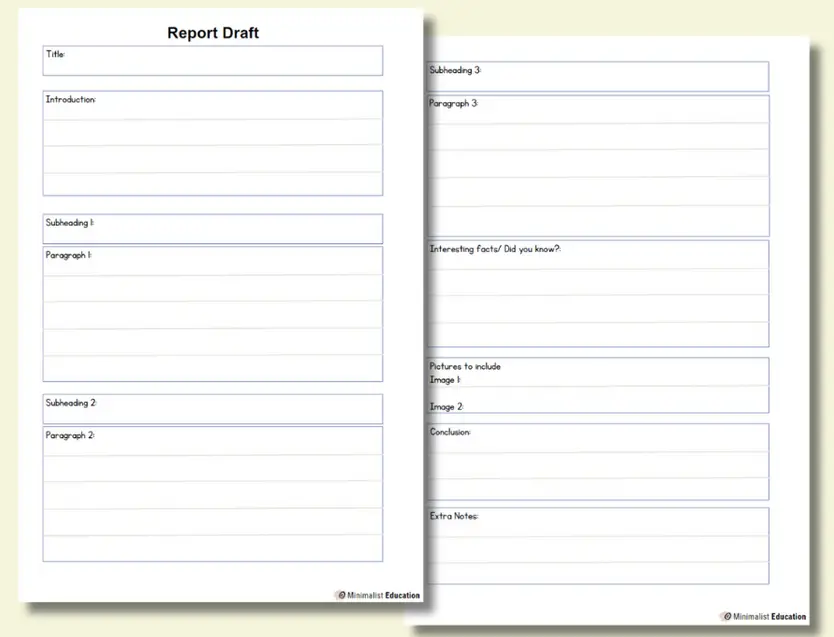
Download the report writing planning template:
If it helps, you can give a prompt to your child to help them write their introduction for example:
Prompt: Imagine you are introducing your topic to someone who knows nothing about it.
This prompt encourages the child to think about their chosen topic and put themselves in the shoes of someone who knows nothing about it. It invites them to use their imagination to come up with an engaging introduction that captures the reader’s attention and makes them curious to explore more.
Here are some example introduction you can look at with your child. Let them feel free to use the structure and language of these as the base for their own introduction.
Topic: Volleyball
Introduction: Volleyball is an amazingly popular sport that is played in nearly every country. It can be played indoors, outdoors, or even on the beach!
Topic: Netball
Introduction: Netball is a fast paced sport that was developed from basketball. It sees players run, leap, pass and catch the ball to outsmart the opposition and score points.
Topic: Rocks
Introduction: Rocks might seem like simple, lifeless objects at first glance, but they play an important role in shaping landscapes, supporting life, and providing us with valuable resources. Discover the different types of rocks, how they form, and how they provide us with valuable resources.
Topic: Baking Biscuits
Introduction: Like any skill, baking has certain requirements to ensure a successful end product. Find out what you need to make the best biscuits in the world.
Topic: Dolphins
Introduction: Dolphins are fascinating creatures that roam the oceans. Explore the incredible world of these playful marine mammals and learn about their extraordinary characteristics and behaviours.
Step 6: Writing the Main Paragraphs
Help your child write detailed paragraphs for each section, providing relevant information and supporting details for each category.
I would recommend first getting your child to freewrite each section and then going back to them (another day) to add transition words and more detail if needed.
If you have been reading enough of this blog, you will know how much I love the technique of freewriting.
Freewriting is a process where kids can write without worrying about grammar, spelling, or structure. It’s all about letting ideas flow freely onto the paper without any constraints. This means they can jot down everything that comes to mind, such as facts, descriptions, or interesting details they want to include in their report for that sub-topic. This helps in building a pool of information to work with later.
Sometimes, the hardest part of writing is getting started. Freewriting provides a low-pressure way to begin the writing process, making it less intimidating for children to begin their non-chronological report.
For each sub-topic of their non-chronological report get your child to freewrite for it. Add a time limit and make sure they know that it doesn’t matter what they write and how they write it as they will be revising it later on.
At the end of this step your child will have produced pieces of writing related to their chosen topic that will form the main paragraphs of their final report.
Now you can go back to each freewrite, and encourage your child to back up their statements with facts, statistics, or anecdotes. This adds credibility to the report and makes it more engaging for readers.
Example paragraph (Physical characteristics of dolphins): “Dolphins have sleek, streamlined bodies that allow them to glide effortlessly through the water. They typically range in length from 6 to 12 feet and weigh between 300 to 1,400 pounds. Their skin is smooth and rubbery, often featuring a greyish-blue colour with a lighter belly. Additionally, dolphins possess a prominent dorsal fin on their backs, which helps with stability during swimming.”
Step 7: Adding Extra information Boxes
If they want they can also add a “fun facts”, “did you know” or a glossary/ key terms box.
All of these make the non-chronological report interesting to look at and engaging to read.
Step 8: Writing the Conclusion
Guide your child to write a short conclusion. This can be a summary of the main points written about, a statement explaining the purpose of the report, or a hope or wish for their topic. Allow it to be simple. Remember, our kids are learning to write. They aren’t producing an article to be published in academic journals!
Example conclusion: “Dolphins are truly remarkable creatures with their extraordinary intelligence, playful nature, and incredible adaptability to life in the oceans. Learning about these fascinating marine mammals reminds us of the diverse and beautiful world we share with them.”
Step 9: Proofreading and Editing
Encourage your child to read their work aloud to check for spelling, grammar or punctuation mistakes. You can do this as you go along, which is how I prefer to do it, or it ends up being a massive task at the end.
Step 10: Writing the final draft
Finally, it’s time to create a polished final draft. This can be handwritten, or typed using a word processing software like Microsoft Word or Google Docs.
Children can use my blank non-chronological report writing template and write directly onto that. Depending on how much information they want to present, I have made a one-page report template and a two-page report template.
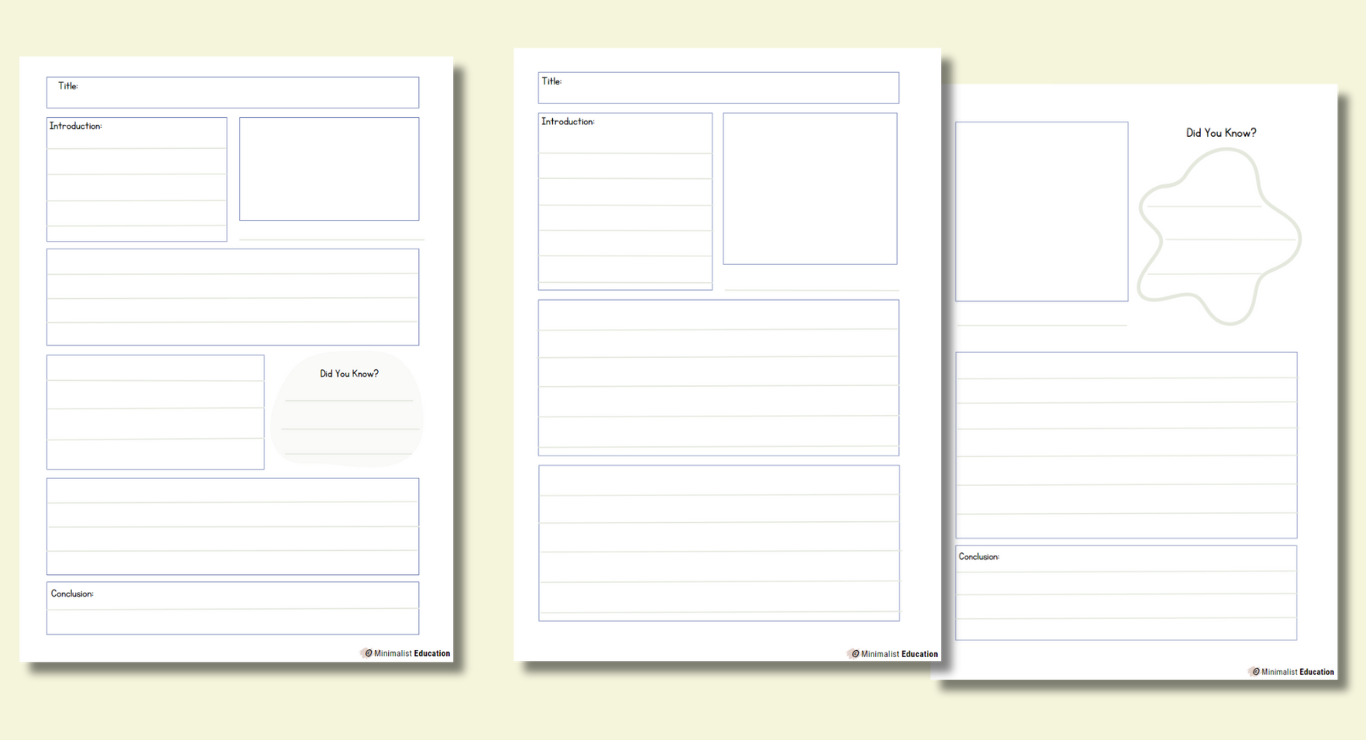
Download the 1-page non-chronological blank writing frame:
Download the 2-page non-chronological blank writing frame:
Your child may already have a really clear idea about how they want to present their report, but if they don’t, here are some points you can talk about that will help guide them through this process.
- Create engaging headings by writing them bigger or using larger fonts for section headings and subheadings to make them stand out. This helps organize the report and allows readers to navigate through it easily.
- Add coloured subheadings or boxes. Encourage your child to use colours to highlight subheadings or create boxes around important information. This visually separates different sections and makes the report more appealing.
- Consider a colour scheme. Your child may want to use a consistent colour scheme for headings, subheadings, and visuals. This adds cohesion to the report and makes it visually attractive.
- Use images and captions. One of the funnest parts of doing a con-chronological report is probably adding visuals to it. Definitely have your child think about any relevant images, illustrations, diagrams, or maps to complement what they have written. Make sure they include a descriptive caption with it.
- Use bullet points or numbered lists. Can some of the information be presented using bullet points or numbered lists?
Is going through the process of writing a non-chronological report a lot of work. Yes.
But remember, this work will be done over many days. Most importantly whilst producing a non-chronological report, your child will get to practice multiple skills, and have a finished writing product at the end that they will be proud of.
I hope this helps some of you out!
Leave a Reply