How to Write Stories-Step 6: Harness the Power of Show Not Tell
This post contains affiliate links. I may get a commission if you decide to make a purchase through my links, at no extra cost to you.
This post is all about getting children to write so that they pull people right into their imagination. In other words, this post is all about getting your child to “show not tell” in their story.
Welcome to Step 6 of our seven steps to story success writing guide where I am going to share two ways children can easily and effectively incorporate show not tell in their writing.
I will be explaining how you can teach this technique, giving some examples so children can really see how show not tell is applied, and I will also be giving some ideas of how your children can easily and effectively incorporate these techniques into their writing.
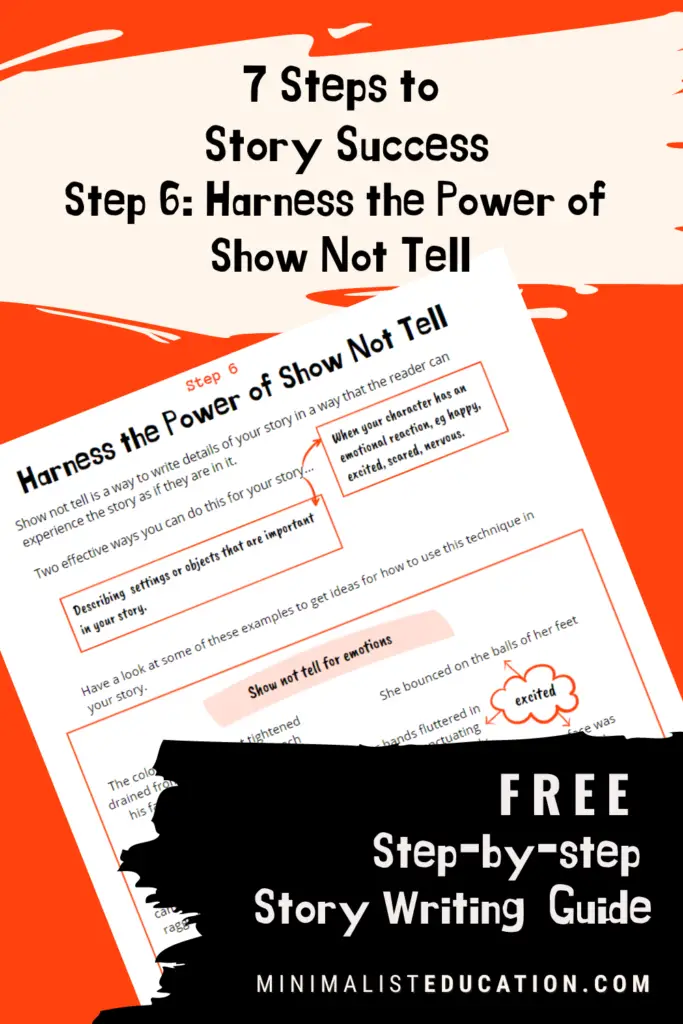
Accompanying show not tell activity pages can be found towards the bottom, available to download and print.
If you missed the previous steps you can catchup here:
- Seven Steps to Story Writing Success: A Story Writing Guide
- Story Writing Guide Step 1: Freewrite!
- Step 2: Sort Out the Nitty Gritty
- Step 3-Plan The Plot
- Step 4-Character Development
- Step 5- Spice Up Writing with VCOP
What is Show Not Tell?
Show not tell is all about writing so that people can visualise the story. Visualise it as if they are watching a film. Or even better, experience the story as if they are right there in the character’s world.
Show not tell is a writing technique that shows the reader information through showing actions, reactions and descriptions using the five senses, rather than telling something outright.
The reason it is such a great technique to use in writing is that it allows the reader to experience what the characters are going through, so it is a perfect technique to really pull readers into the character’s world.
Using the technique of show not tell is something that will make your children’s writing better, but it isn’t always easy to implement.
In this post I have selected and will explain two easy and effective ways your child can start using this technique in their story.
Tip #1: Use Show Not Tell for Character Emotions
One of the easiest ways to use show not tell in a story is to use it for character emotions.
The easiest way to grasp this concept is if I just show you examples rather than me just telling you what it is.
Telling: she was scared.
Showing: A branch snapped behind her, and her heart skipped a beat. She spun around, her wide eyes scanning the surroundings. A bead of sweat trickled down her forehead, mingling with her growing sense of dread. The silence that followed was suffocating; the absence of sound heightening her senses. Her breath came in shallow gasps as she battled against the primal urge to run. She knew that fleeing would only attract more attention.
Telling: the little boy was scared.
Showing: A creaking sound echoed through the old wooden floorboards, causing the little boy’s heart to race. His small frame was curled up tightly in the corner of the room, his knees drawn up to his chest. He clutched his stuffed teddy bear, its worn fur offering a slight comfort. His eyes darted anxiously around the room, searching for any sign of danger. The faint hooting of an owl outside sent shivers down his spine, making him tremble involuntarily.
Telling: She was excited to be at the funfair.
Showing: The vibrant lights illuminated the night sky, creating a kaleidoscope of colours that danced across the girl’s wide-eyed gaze. Her small hand clasped tightly around her father’s, her fingers tingling with anticipation. The rhythmic melody of laughter and cheerful chatter enveloped her, infusing her with an infectious energy. Her feet barely touched the ground as she skipped along, her pink dress billowing in the warm breeze. With each step, her heart raced faster, matching the tempo of the thrilling rides that beckoned her. A squeal escaped her as she immersed herself in the pulsating heartbeat of the funfair.
Telling: He dreaded being at the funfair.
Showing: The boy’s shoulders slumped as he followed his parents through the noisy crowds. The blaring music and raucous laughter grated against his ears, causing his brow to furrow. The air was thick with the greasy smell of fried food and sickly scent of candy floss. Every step felt heavier than the last, as if he was trudging through an unending maze of whirling lights and forced fun.
Telling: She was disappointed to receive the gift.
Showing: As the gift was revealed, her smile faltered, the corners of her lips dipping slightly, as she looked the item nestled within the box. Her fingers gingerly touched the material, their touch hesitant, as if trying to reconcile her disappointment with the effort that went into the gift. Her eyes darted to her aunt. Though she fought to muster gratitude, her attempt to conceal her true feelings was palpable. The moment hung in the air.
Playing Charades to teach Show Not Tell for character emotions
This is easily the FUN-est and most effective activity that I’ve used for English in our homeschool and in the class.
Here’s a run-down on how you can use charades for teaching show not tell:
If there are siblings you definitely want to get them involved for this, as the more people there are the more fun it is. It can still be played with just you and your child- it will be just as effective.
Explain the game; if your child has never played it before, describe how charades works.
In charades, a player acts out a word or phrase without speaking, using only gestures, body language, and facial expressions to communicate the message. The remaining players have to guess what the word or phrase it.
For the purpose of using this game for teaching show not tell, stick to using emotion words. Emphasise that in this game, the players need to “show” rather than “tell” the emotion word.
Before getting your child to go first, you might want to share a few examples of “tell” statements and their corresponding “show” versions. For instance, you could say, “Instead of saying ‘Sara was scared,’ you can show it by trembling hands, wide eyes, and backing away slowly.”
You can make emotions up on the spot for this or create emotion cards which contain a specific emotion that they player will have to act out. If multiple kids are playing, make sure the words are appropriate for all the levels of your children.
After they have guessed correctly, you can identify the specific actions that help conveyed the emotions. If you want you can write these down, so your child can refer to these show not tell features when they come to write their story.
If you have enough people, you might want to divide the group into teams. If the game is being played in teams, a member from the first team selects a card and silently reads the word or phrase. The rest of the team tries to guess the word. If the team guesses correctly within a given time limit (e.g., one minute), they score a point. Just repeat the process with the next team, and continue until all the cards have been used or a set number of rounds have been completed.
This game should really highlight the impact of visual cues on engagement of an audience. It should also make applying the technique of show not tell easier and more meaningful.
Tip #2: Use Show Not Tell using the five senses
My second tip for using show not tell is to use the five senses for describing settings and surroundings.
It is quite common for children to glaze over the setting and surroundings in their stories, but good writing invites the reader to visualise the scene rather than being told, for example, that the forest was spooky.
The forest may be spooky to the character, but it needs to feel spooky to the reader or the story will feel flat.
How to teach show not tell using sensory details
Evidence. It’s as simple as that. Encourage your child to back up statements with evidence. Give evidence that the forest is spooky, don’t just say it.
The effectiveness of showing not telling relies on being very specific.
Examples of show not tell for settings and surroundings using sensory details:
Tell: The forest was spooky.
- Show using the sense of sight: The tress seemed to lean closer, their silhouettes reaching like skeletal fingers.
- Show using the sense of hearing: The rustling leaves whispered in a hushed chorus, their murmurs echoing through the air.
- Show using the sense of touch: The air felt heavy and suffocating, clinging to his skin like a hot breath.
- Show using the sense of smell: The air carried an unsettling scent- a peculiar mixture of damp earth and decaying leaves, with a faint undertone of something she could not quite place.
- Show using the sense of taste: The taste of earthy decay and mossy dampness was tangible on his tongue.
Show Not Tell Resources
Product Review: Descriptosaurus by Alison Cox
Descriptosaurus written by Alison Wilcox (paid link) really helped my children improve their descriptive writing skills. It provides a collection of descriptive phrases and vocabulary, organised into categories, which kids can use as a reference to help them craft vivid and engaging descriptions.
I personally benefit from having this book in my homeschool and as a reference for teaching in class as I often struggle to come up with really effective and unique descriptions to give as examples for all of the different scenarios my kids and my class come up with, so I draw a lot of my inspiration from this book, as do the kids.
The book is full of examples that uses specific and sensory language to create a strong visual and emotional impact on the reader. It is the ultimate and only resource you will need for teaching show not tell.
After having this book for many years I am still totally impressed with the content and the flexibility with which I can use it.
If improving creative writing is one of your homeschool goals, this book is a must have.
In the meantime, I have created a reference sheet that has a few examples of show not tell that can be used by kids as a starting point to generate ideas for their own show not tell descriptions in their stories.
I have created a task where your child can choose up to three emotions their characters experience. This can be three different emotions experienced by their main character, or any of the other characters. Once they’ve chosen the emotions that they want to show not tell, they can work on using this technique to show their reader what the characters are feeling.
There is also a task where your child can choose up to three settings and objects that appear in the story. Once they have chosen them, they have to determine what tone and mood they want associated with that setting or object. They can the work on describing them using multiple senses keeping in mind to use word choices that convey the mood intended.
Download my child-friendly activity sheets for this step and use the prompts to practice the technique of show not tell in the context of your child’s story:
A word of warning
Too much show and not tell can make writing overly detailed or melodramatic.
A lot of the time it is completely fine, if not preferable to just outright tell rather than show, otherwise the story would get too slow.
Over time your child will get a better sense of when to use show not tell and when to just plainly state what is happening.
As a general guide:
- Use show not tell when you really want to draw the reader in and make readers feel connected to the character.
- The ideal situations to use show not tell are for character emotions and using sensory details to describe surroundings.
- Use tell when describing something unimportant and moving the story along in time and place.
I hope this has helped some of you out. One more step to go!
The step that all of the other steps have been leading up to.
Leave a Reply